
こんにちは、JS2IIUです。
Pythonで手軽にWebインターフェースを構築できるGradioは、機械学習モデルのデモやプロトタイプ開発で広く利用されています。中でも、複雑なUIを柔軟に設計できるのがgr.Blocksです。この記事では、Blocksの基本構文から応用テクニックまでを解説し、縦横レイアウトの組み合わせ、タブ切り替え、折りたたみ式コンテンツ、さらにモバイル対応のレスポンシブ設計までを取り上げます。今回もよろしくお願いします。
1. Blocksの基本構文と内部構造
gr.BlocksはGradioにおける”レイアウトコンテナ”で、複数のコンポーネントを木構造で管理します。内部的には、各コンポーネントをDSL(Domain Specific Language)的に定義し、最終的にHTML/CSS/JavaScriptに変換してクライアントに配信します。
import gradio as gr

with gr.Blocks() as demo:
    gr.Textbox(label="名前を入力してください")
    gr.Button("送信")

demo.launch(server_name="0.0.0.0", server_port=7860, share=False)
1.1 Blocksオブジェクトの技術詳細
コンテキストマネージャの役割:
with gr.Blocks() as demo::コンテキストマネージャーでBlocksオブジェクトを生成。内部でContextクラスがスタック管理を行い、以降のUI定義はこのインスタンスに紐づけられます- コンテキスト内で作成されたすべてのコンポーネントは、自動的に親Blocksインスタンスの
childrenリストに追加されます
launchメソッドの詳細設定:
demo.launch(
    server_name="0.0.0.0",  # 0.0.0.0で全インターフェースからアクセス可能
    server_port=7860,       # デフォルトポート
    share=False,            # share=Trueでngrokによる一時的な公開URL発行
    auth=("user", "pass"),  # 基本認証の設定
    ssl_keyfile=None,       # HTTPS化のためのSSL設定
    ssl_certfile=None,
    max_threads=40,         # 並行処理スレッド数
    show_error=True         # エラー詳細の表示可否
)1.2 内部のレンダリングフローと最適化
レンダリングの詳細プロセス:
- Python側でのコンポーネントツリー構築
- 各コンポーネントは
Componentクラスを継承し、render()メソッドでJSON表現を生成 - 依存関係グラフが自動構築され、更新時の再描画範囲を最適化
- 起動時のクライアント送信
- JSON形式でコンポーネント仕様、スタイル、イベントハンドラーをブラウザに送信
- 初期状態は約5-10KBのペイロードサイズ(コンポーネント数により変動)
- ブラウザ側でのReactマウント
- Gradio独自のReactコンポーネント(
@gradio/uiパッケージ)にマウント - Virtual DOM による効率的な更新処理
- イベント処理の最適化
- WebSocket(ws://またはwss://)経由でPythonバックエンドと双方向通信
- debouncing機能により、短時間の連続イベントを統合して処理
パフォーマンス最適化のポイント:
# メモリ効率の良いBlocksの使い方
with gr.Blocks(analytics_enabled=False) as demo:  # 分析データ送信を無効化
    # 大量のコンポーネントを扱う場合は、visible=Falseで初期非表示
    heavy_component = gr.DataFrame(visible=False)

    def show_data():
return gr.update(visible=True) # 必要時のみ表示gr.Blocks(analytics_enabled=False)
→ Gradioの匿名分析データの送信を無効化して、少しでもオーバーヘッドを減らします。gr.DataFrame(visible=False)
→ 初期状態では非表示にすることで、レンダリングやリソース使用を最小限に抑えます。特に、行数が多いデータフレームでは有効です。gr.update(visible=True)を返す関数
→ 必要になったタイミングでのみ表示を切り替える仕組み。ユーザーがアクションしたときに表示されるようにできます。
2. RowとColumnによるレイアウト構築
レイアウトを細かく制御するには、gr.Rowとgr.Columnを使ってグリッド構造を組み立てます。背後ではCSS Grid Layout(display: grid)が利用されており、各要素は自動的にレスポンシブに再配置されます。
2.1 Row:横並びレイアウトの詳細制御
with gr.Blocks() as demo:
    with gr.Row(equal_height=True, variant="panel"):  # variant追加
        name_first = gr.Textbox(label="姓", min_width=150)
        name_last = gr.Textbox(label="名", min_width=150)
    gr.Button("送信")
demo.launch()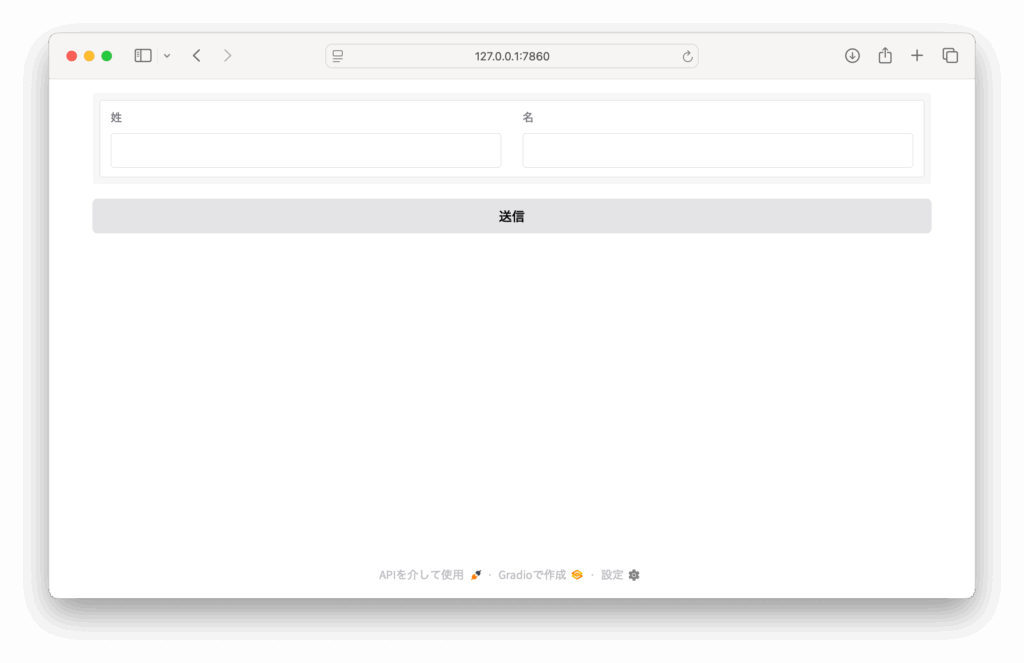
Rowの技術仕様:
equal_height=True:子要素の高さをalign-items: stretchで統一variant="panel":視覚的なグループ化のための背景色とボーダー設定min_width:レスポンシブ折り返しの閾値を指定(ピクセル単位)
CSS Grid による内部実装:
/* Gradio内部で生成されるCSS */
.gradio-row {
    display: grid;
    grid-auto-flow: column;
    grid-auto-columns: 1fr;
    gap: var(--spacing-md);
}2.2 Column:縦並びレイアウトとflex制御
with gr.Blocks() as demo:
    with gr.Column(scale=1, min_width=300):  # 最小幅指定
        gr.Textbox(label="メールアドレス", type="email")  # HTML5 type指定
        gr.Textbox(label="電話番号", type="tel")
    gr.Button("登録", variant="primary")  # 主要ボタンのスタイル
demo.launch()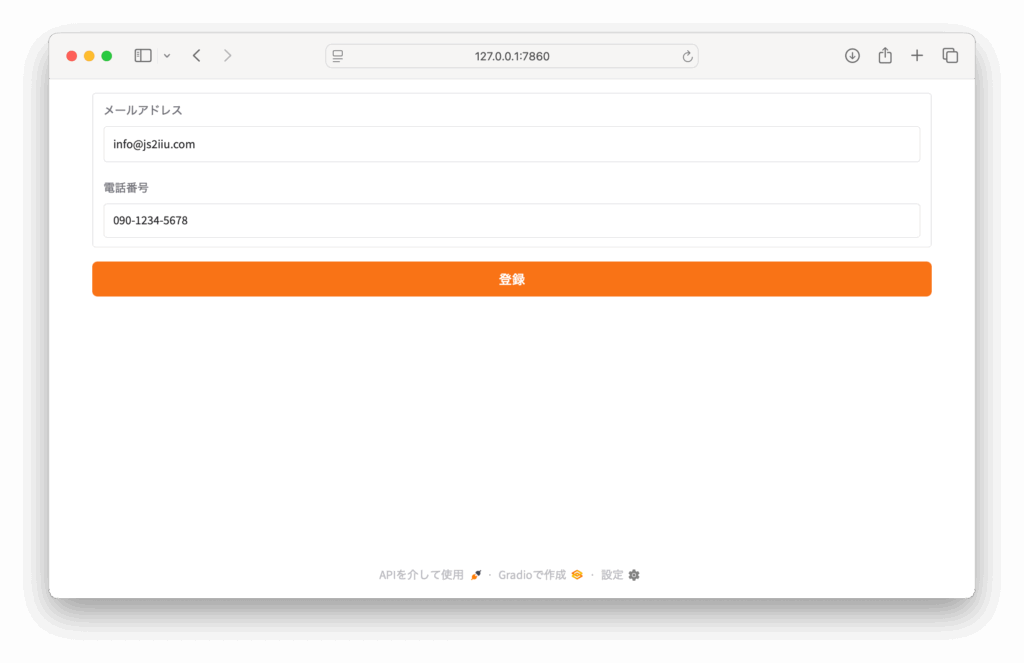
Columnの高度な設定:
scale:親コンテナ内での相対的な幅の比率(flex-grow相当)min_width:折り返し発生の最小幅(レスポンシブ対応)type属性:HTML5のinput typeを指定してモバイル最適化
2.3 ネストによる複雑なレイアウト設計
with gr.Blocks(css="footer { margin-top: 50px; }") as demo:  # カスタムCSS
    # ヘッダー部分
    with gr.Row():
        gr.Markdown("# データ解析ダッシュボード")
        gr.Button("🔄 更新", scale=0)  # scale=0で内容に応じた最小幅

    # メインコンテンツ
    with gr.Row():
        # 左サイドバー(設定パネル)
        with gr.Column(scale=1, min_width=250):
            gr.Markdown("### 設定")
            with gr.Group():  # 視覚的なグループ化
                gr.Slider(label="データ範囲", minimum=1, maximum=100)
                gr.Dropdown(label="可視化タイプ", choices=["線グラフ", "棒グラフ"])

        # メインコンテンツエリア
        with gr.Column(scale=3):
            gr.Plot(label="結果表示")  # Plotlyグラフの埋め込み

    # フッター
    with gr.Row():
        gr.Markdown("© 2025 データ解析チーム")

demo.launch()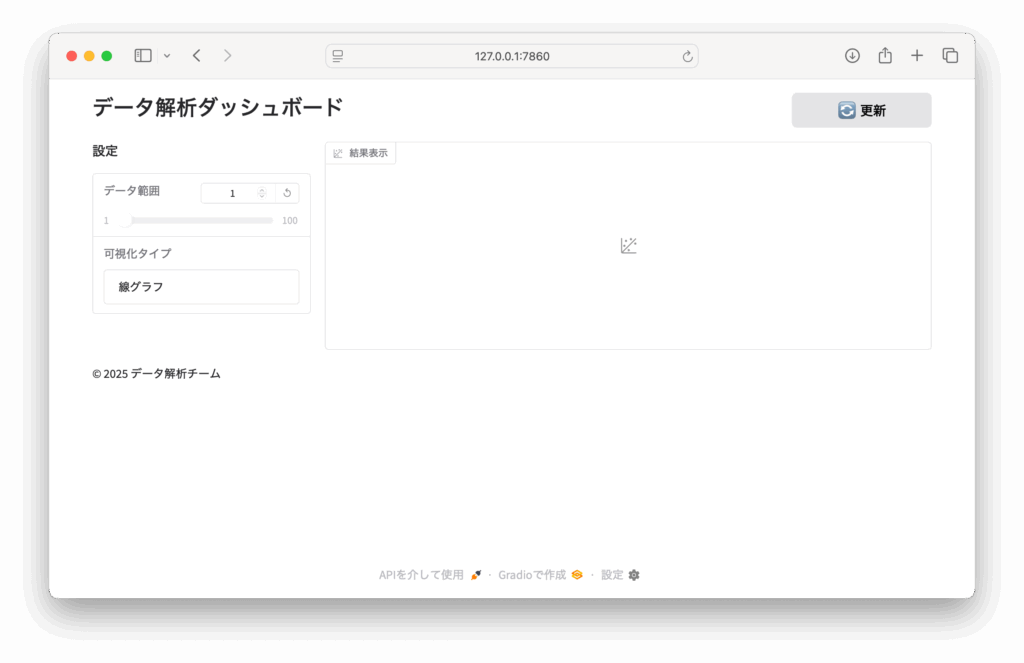
レイアウト設計のベストプラクティス:
gr.Group():関連するコンポーネントを視覚的にグループ化scale=0:コンテンツに応じた最小幅(アイコンボタン等に最適)- カスタムCSS:
cssパラメータでアプリ全体のスタイル調整
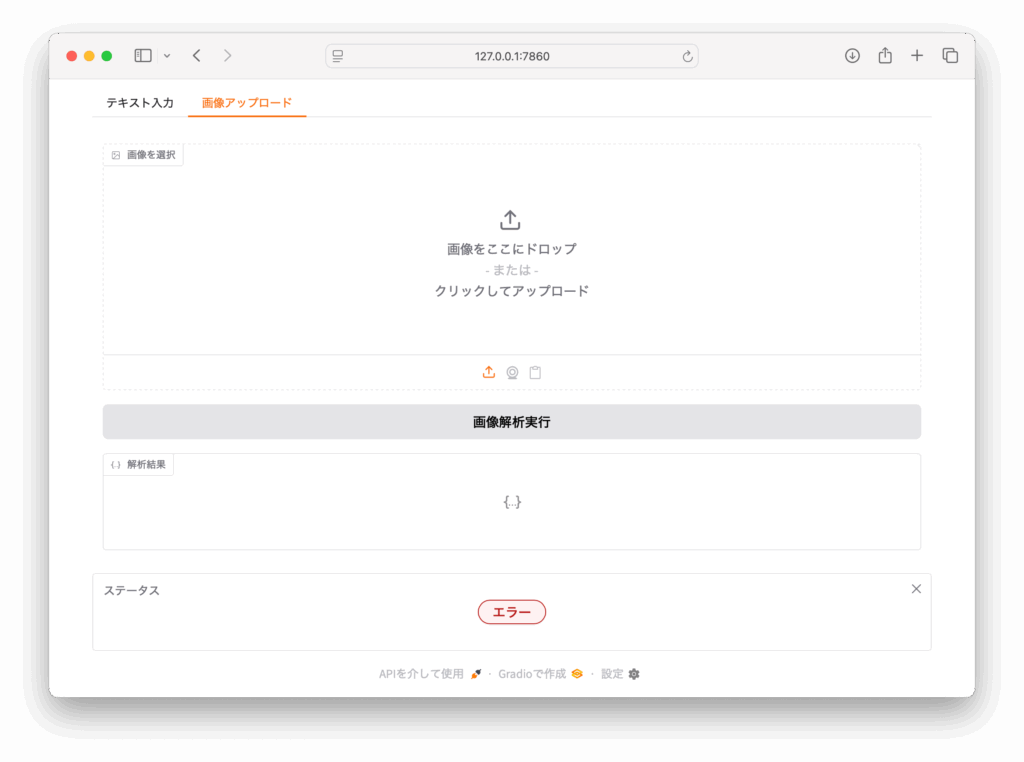
3. Tabsで機能を分離する
複数機能を同一ページ上で切り替えるには、gr.Tabsとgr.TabItemを使います。内部でReactのタブコンポーネント(react-tabsライブラリをベース)にマッピングされ、スムーズな切り替えが可能です。
with gr.Blocks() as demo:
    with gr.Tabs(selected="text_tab") as tabs:  # デフォルト選択タブ
        with gr.TabItem("テキスト入力", id="text_tab"):
            text_input = gr.Textbox(label="コメント", lines=3)
            text_btn = gr.Button("送信コメント")
            text_output = gr.Textbox(label="結果", interactive=False)

        with gr.TabItem("画像アップロード", id="image_tab"):
            image_input = gr.Image(type="pil", label="画像を選択")
            image_btn = gr.Button("画像解析実行")
            image_output = gr.JSON(label="解析結果")

    # タブ切り替えイベントの処理
    def on_tab_change(selected_tab):
        return f"現在のタブ: {selected_tab}"

    status = gr.Textbox(label="ステータス")
    tabs.change(on_tab_change, inputs=tabs, outputs=status)

demo.launch()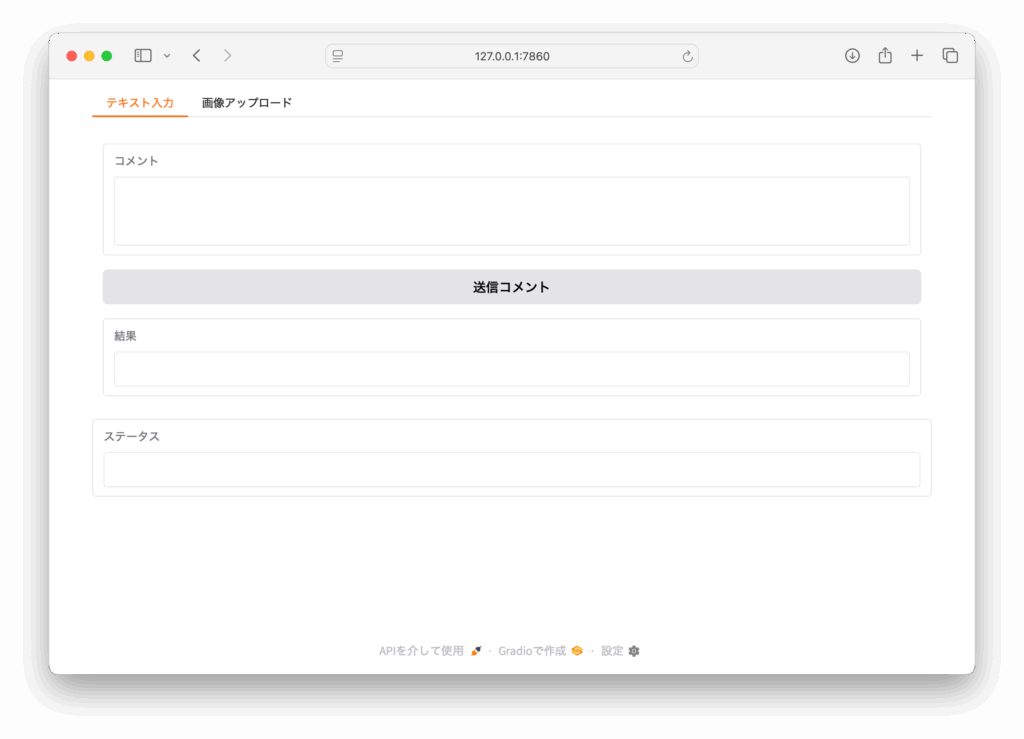
タブ機能の技術詳細:
- 選択状態の管理:
selectedパラメータで初期選択タブを指定 - イベントハンドリング:
.change()でタブ切り替え時の処理を定義 - メモリ効率:非表示タブのコンテンツは
display: noneで隠すだけなので、状態は保持される - アクセシビリティ:WAI-ARIA準拠のタブUI(キーボードナビゲーション対応)
動的なタブ制御の例:
def update_tabs_visibility(user_role):
    if user_role == "admin":
        return gr.update(visible=True), gr.update(visible=True)
    else:
        return gr.update(visible=True), gr.update(visible=False)

user_role = gr.Dropdown(["user", "admin"], label="ユーザー権限")
user_role.change(
    update_tabs_visibility,
    inputs=user_role,
    outputs=[text_tab, admin_tab]
)4. Accordionで情報を折りたたむ
詳細設定や補足情報は、gr.Accordionで折りたたむと画面がすっきりします。HTMLの<details>/<summary>タグ相当のUIを提供しており、CSS transitionでスムーズなアニメーションも実現されています。
with gr.Blocks() as demo:
    gr.Textbox(label="ユーザー名")

    with gr.Accordion("詳細設定", open=False) as accordion:
        email_notify = gr.Checkbox(label="メール通知を有効にする", value=True)
        notify_freq = gr.Slider(
            label="通知頻度(時間)",
            minimum=1, maximum=24, step=1, value=6
        )

        with gr.Accordion("高度な設定", open=False):
            gr.Number(label="APIタイムアウト(秒)", value=30)
            gr.Textbox(label="カスタムエンドポイント", placeholder="https://api.example.com")

    def on_notify_change(is_enabled):
        return f"メール通知: {'有効' if is_enabled else '無効'}"

    status = gr.Textbox(label="状態")
    email_notify.change(on_notify_change, inputs=email_notify, outputs=status)

demo.launch()Accordionの技術実装詳細:
- アニメーション:CSS
max-height+transitionによる滑らかな開閉 - 状態管理:開閉状態は
gr.Stateで管理され、他のコンポーネントから参照可能 - アクセシビリティ:ARIA属性(
aria-expanded,aria-controls)を自動設定 - パフォーマンス:内容が多い場合、閉じた状態では描画処理をスキップ
条件付き表示の実装例:
def toggle_advanced_settings(enable_advanced):
    return gr.update(visible=enable_advanced)

enable_advanced = gr.Checkbox(label="高度な設定を有効化")
with gr.Accordion("高度な設定", visible=False) as advanced_accord:
    gr.Textbox(label="API Key")

enable_advanced.change(
    toggle_advanced_settings,
    inputs=enable_advanced,
    outputs=advanced_accord
)5. 実践例:複合レイアウトのフォーム
ここまでの要素を組み合わせて、実用的なお問い合わせフォームを作成します。バリデーション機能と送信処理も含めた完全な例を示します。
import re
from datetime import datetime

def validate_email(email):
    pattern = r'^[a-zA-Z0-9._%+-]+@[a-zA-Z0-9.-]+\.[a-zA-Z]{2,}$'
    return re.match(pattern, email) is not None

def submit_form(name, email, message, screenshot, notify_me):
    # バリデーション
    errors = []
    if not name.strip():
        errors.append("名前は必須です")
    if not validate_email(email):
        errors.append("有効なメールアドレスを入力してください")
    if len(message.strip()) < 10:
        errors.append("メッセージは10文字以上で入力してください")

    if errors:
        return "\n".join(f"❌ {error}" for error in errors), ""

    # 送信処理(実際のアプリではAPI呼び出し等)
    timestamp = datetime.now().strftime("%Y-%m-%d %H:%M:%S")
    result = f"""
    ✅ お問い合わせを受け付けました

    送信時刻: {timestamp}
    名前: {name}
    メール: {email}
    通知設定: {'有効' if notify_me else '無効'}
    添付ファイル: {'あり' if screenshot else 'なし'}

    メッセージ:
    {message}
    """

    return "", result

with gr.Blocks(title="お問い合わせフォーム", theme=gr.themes.Soft()) as demo:
    gr.Markdown("# 📝 お問い合わせフォーム")

    # 上段:基本情報の2カラムレイアウト
    with gr.Row():
        with gr.Column(scale=1):
            name_input = gr.Textbox(
                label="お名前",
                placeholder="山田 太郎",
                max_lines=1,
                info="必須項目です"
            )
            email_input = gr.Textbox(
                label="メールアドレス",
                placeholder="example@mail.com",
                type="email",
                info="返信用のメールアドレス"
            )
        with gr.Column(scale=1):
            screenshot_input = gr.Image(
                type="pil",
                label="スクリーンショット(任意)",
                height=200,
                info="問題の画面キャプチャがあればアップロード"
            )

    # 中段:折りたたみ式の詳細入力
    with gr.Accordion("お問い合わせ内容", open=True):
        message_input = gr.Textbox(
            label="メッセージ",
            lines=6,
            placeholder="ご質問やご要望を詳しく入力してください(10文字以上)",
            max_lines=20
        )

        # 設定オプション
        with gr.Row():
            notify_checkbox = gr.Checkbox(
                label="返信通知をメールで受け取る",
                value=True
            )
            urgent_checkbox = gr.Checkbox(
                label="緊急対応が必要",
                value=False
            )

    # 下段:送信とフィードバック
    with gr.Row():
        submit_btn = gr.Button(
            "📤 送信",
            variant="primary",
            scale=0
        )
        clear_btn = gr.Button(
            "🗑️ クリア",
            variant="secondary",
            scale=0
        )

    # 結果表示エリア
    with gr.Row():
        error_output = gr.Textbox(
            label="エラー",
            visible=False,
            lines=3
        )
        success_output = gr.Textbox(
            label="送信結果",
            visible=False,
            lines=8
        )

    # イベントハンドラー
    def handle_submit(name, email, message, screenshot, notify_me):
        error_msg, success_msg = submit_form(name, email, message, screenshot, notify_me)

        if error_msg:
            return (
                gr.update(value=error_msg, visible=True),    # エラー表示
                gr.update(visible=False)                      # 成功メッセージ非表示
            )
        else:
            return (
                gr.update(visible=False),                     # エラー非表示
                gr.update(value=success_msg, visible=True)    # 成功メッセージ表示
            )

    def clear_form():
        return "", "", "", None, True, gr.update(visible=False), gr.update(visible=False)

    # イベント接続
    submit_btn.click(
        handle_submit,
        inputs=[name_input, email_input, message_input, screenshot_input, notify_checkbox],
        outputs=[error_output, success_output]
    )

    clear_btn.click(
        clear_form,
        outputs=[name_input, email_input, message_input, screenshot_input, notify_checkbox, error_output, success_output]
    )

demo.launch()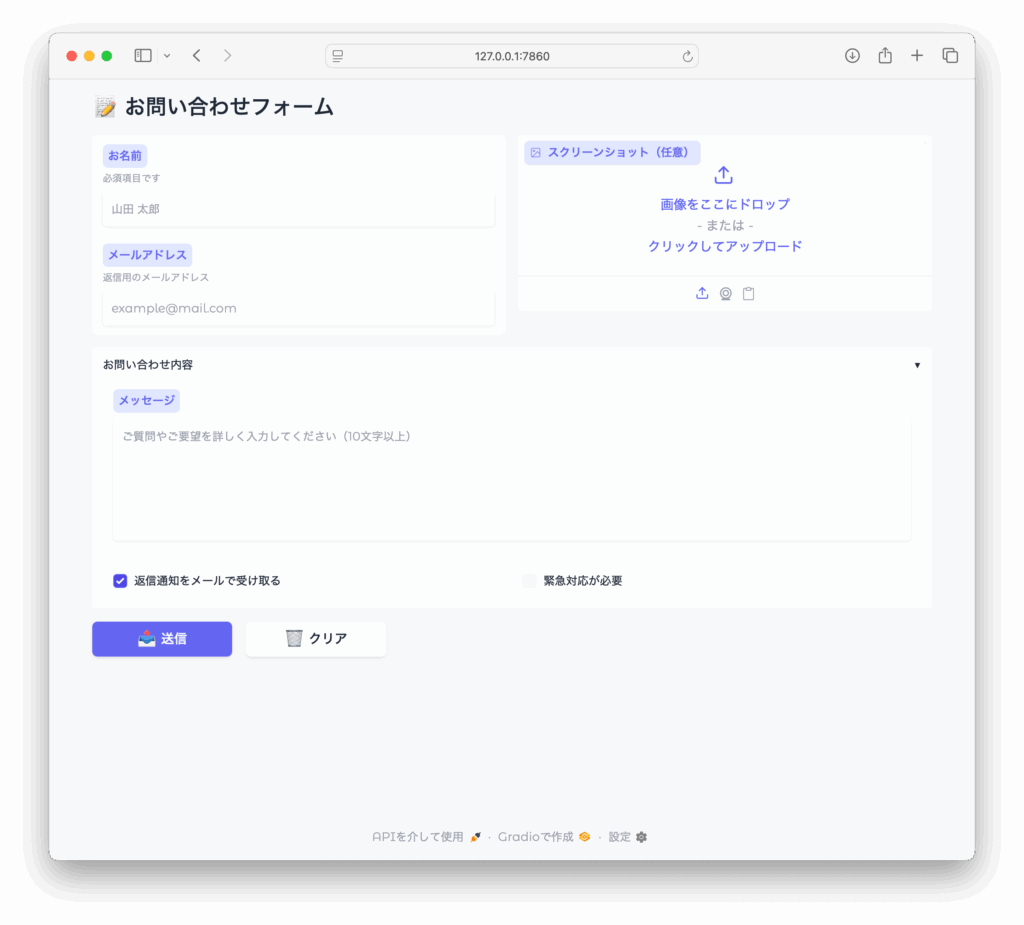
実装のポイント:
- リアルタイムバリデーション:入力値の検証とエラー表示
- 条件付きUI更新:
gr.update()でコンポーネントの表示/非表示を動的制御 - ユーザビリティ:
infoパラメータでヘルプテキスト、placeholderで入力例を提示 - テーマ適用:
gr.themes.Soft()で統一されたデザイン
6. UIイベントとPython関数の連携
Gradioのコールバックシステムは非同期対応しており、同期関数・非同期関数どちらも利用可能です。イベントハンドラはWebSocket経由で呼び出され、concurrent.futuresベースのスレッドプールで並行処理されます。
import asyncio
import aiohttp
import time
from concurrent.futures import ThreadPoolExecutor

# 同期関数(CPUバウンドな処理向け)
def cpu_intensive_task(data, iterations):
    start_time = time.time()
    result = 0
    for i in range(iterations * 1000000):
        result += i * len(data)

    elapsed = time.time() - start_time
    return f"同期処理完了: {result}, 処理時間: {elapsed:.2f}秒"

# 非同期関数(I/Oバウンドな処理向け)
async def fetch_api_data(url, timeout=10):
    try:
        async with aiohttp.ClientSession(timeout=aiohttp.ClientTimeout(total=timeout)) as session:
            async with session.get(url) as response:
                if response.status == 200:
                    data = await response.json()
                    return f"API取得成功: {len(data)} items"
                else:
                    return f"API エラー: HTTP {response.status}"
    except asyncio.TimeoutError:
        return "タイムアウトエラー"
    except Exception as e:
        return f"取得エラー: {str(e)}"

# 並行処理のデモ
async def parallel_processing(query1, query2):
    # 複数のAPIを並行して呼び出し
    tasks = [
        fetch_api_data(f"https://jsonplaceholder.typicode.com/posts?q={query1}"),
        fetch_api_data(f"https://jsonplaceholder.typicode.com/users?q={query2}"),
    ]

    results = await asyncio.gather(*tasks, return_exceptions=True)
    return f"並行処理結果:\n1. {results[0]}\n2. {results[1]}"

with gr.Blocks() as demo:
    gr.Markdown("## 🔄 同期・非同期処理のデモ")

    with gr.Row():
        # 入力エリア
        with gr.Column(scale=1):
            data_input = gr.Textbox(label="データ", value="sample")
            iterations_input = gr.Number(label="処理回数", value=100)
            api_url = gr.Textbox(
                label="API URL",
                value="https://jsonplaceholder.typicode.com/posts"
            )

        # 制御ボタン
        with gr.Column(scale=1):
            sync_btn = gr.Button("🔄 同期処理実行", variant="secondary")
            async_btn = gr.Button("⚡ 非同期処理実行", variant="primary")
            parallel_btn = gr.Button("🚀 並行処理実行", variant="primary")

    # 結果表示
    with gr.Tabs():
        with gr.TabItem("同期結果"):
            sync_output = gr.Textbox(label="処理結果", lines=3)
        with gr.TabItem("非同期結果"):
            async_output = gr.Textbox(label="API取得結果", lines=3)
        with gr.TabItem("並行処理結果"):
            parallel_output = gr.Textbox(label="並行処理結果", lines=5)

    # プログレス表示
    progress = gr.Progress()

    def sync_with_progress(data, iterations):
        for i in progress.tqdm(range(5), desc="同期処理中..."):
            time.sleep(0.2)  # 処理のシミュレーション
        return cpu_intensive_task(data, iterations)

    # イベントハンドラーの接続
    sync_btn.click(
        sync_with_progress,
        inputs=[data_input, iterations_input],
        outputs=sync_output
    )

    async_btn.click(
        fetch_api_data,
        inputs=api_url,
        outputs=async_output
    )

    parallel_btn.click(
        parallel_processing,
        inputs=[data_input, iterations_input],  # クエリパラメータとして使用
        outputs=parallel_output
    )

demo.launch()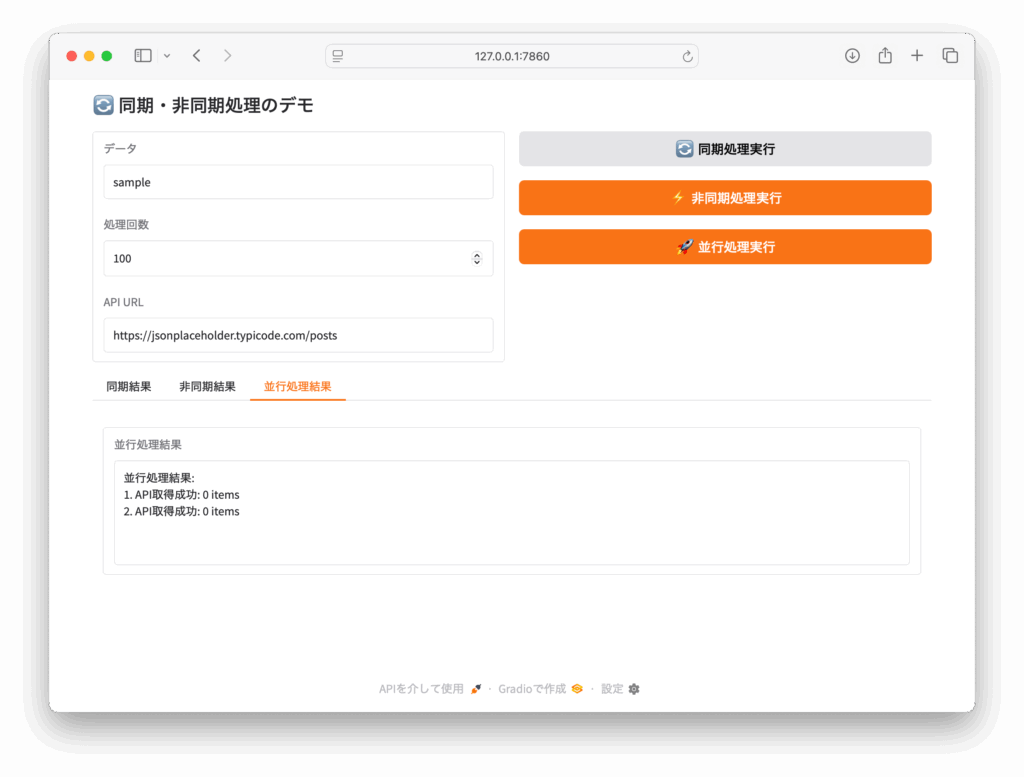
イベント処理の技術詳細:
1. 同期vs非同期の使い分け:
- 同期関数:CPU集約的な処理(データ処理、機械学習推論など)
- 非同期関数:I/O待機が多い処理(API呼び出し、ファイル読み込みなど)
2. 並行処理の最適化:
# 大量データ処理の効率化
async def process_batch(items):
    semaphore = asyncio.Semaphore(10)  # 同時実行数制限

    async def process_item(item):
        async with semaphore:
            return await some_async_operation(item)

    tasks = [process_item(item) for item in items]
return await asyncio.gather(*tasks)3. エラーハンドリングとタイムアウト:
def safe_handler(func):
    def wrapper(*args, **kwargs):
        try:
            return func(*args, **kwargs)
        except Exception as e:
            return f"エラーが発生しました: {str(e)}"
    return wrapper

@safe_handler
def risky_operation(data):
    # エラーが発生する可能性のある処理
return process_data(data)7. レスポンシブ対応の設計ポイント
BlocksはデフォルトでCSS Grid Layout(display: grid)を用いた自動レスポンシブですが、さらに品質を高めるためのテクニックを紹介します。内部的には、ブラウザのビューポート幅に応じてメディアクエリが適用されます。
7.1 自動折り返しによる適応とブレークポイント
with gr.Blocks(css="""
    /* カスタムメディアクエリの例 */
    @media (max-width: 768px) {
        .gradio-container { padding: 10px !important; }
        .gradio-row { grid-auto-flow: row !important; }
    }
    @media (max-width: 480px) {
        .gradio-button { width: 100% !important; }
    }
""") as demo:

    with gr.Row():
        # 4つの要素が画面幅に応じて自動折り返し
        item1 = gr.Textbox(label="項目1", min_width=200)
        item2 = gr.Textbox(label="項目2", min_width=200)
        item3 = gr.Textbox(label="項目3", min_width=200)
        item4 = gr.Textbox(label="項目4", min_width=200)

demo.launch()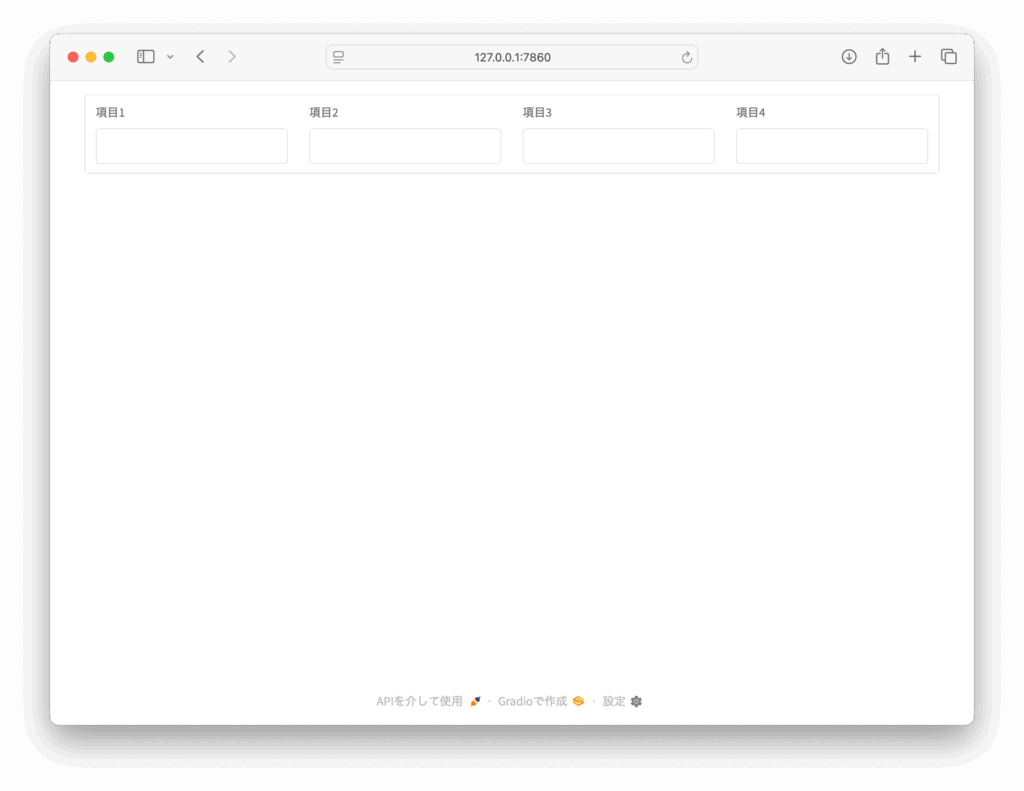
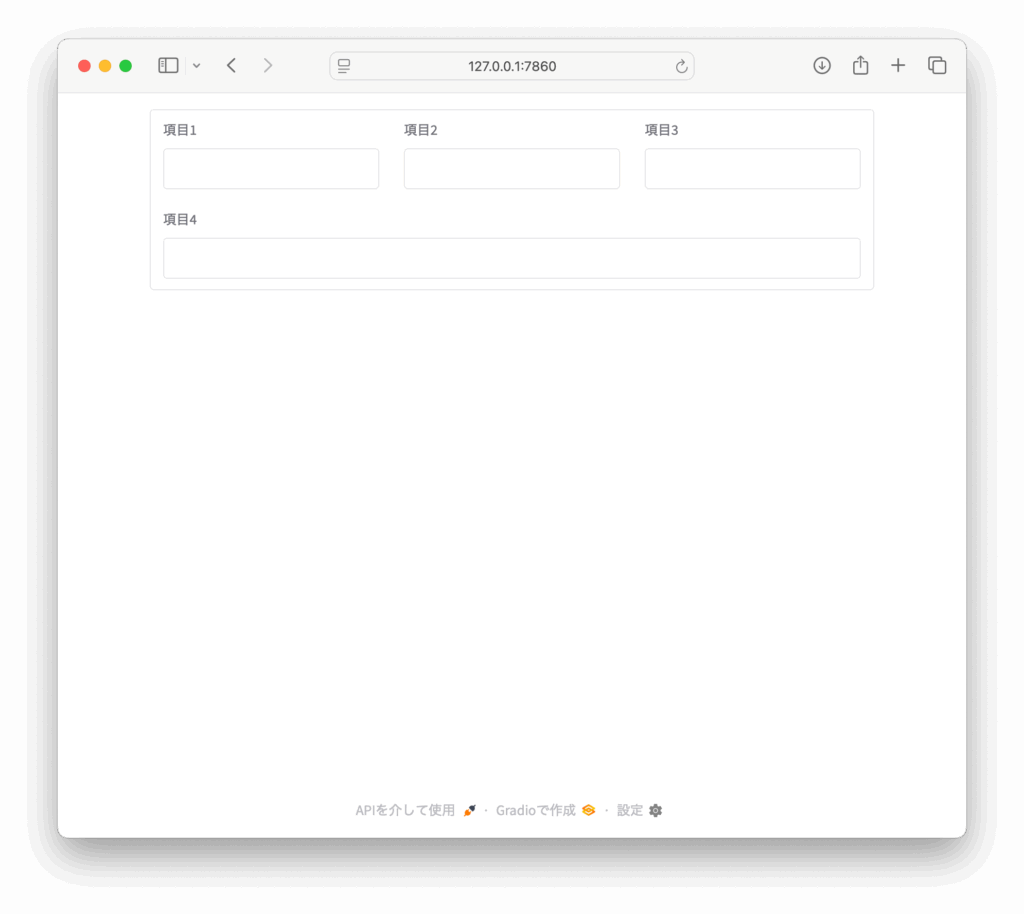
ブレークポイントの詳細:
- 1200px以上:デスクトップレイアウト(4カラム)
- 768px-1199px:タブレットレイアウト(2カラム)
- 767px以下:モバイルレイアウト(1カラム)
7.2 scaleパラメータによる柔軟な比率制御
with gr.Blocks() as demo:
    # デスクトップでは3:1、モバイルでは1:1の比率に自動調整
    with gr.Row():
        main_content = gr.Textbox(
            label="メインエディタ",
            lines=10,
            scale=3,
            min_width=300  # 最小幅を下回ると折り返し
        )
        with gr.Column(scale=1, min_width=250):
            gr.Markdown("### ツールパネル")
            gr.Button("保存")
            gr.Button("プレビュー")
            gr.Button("共有")

demo.launch()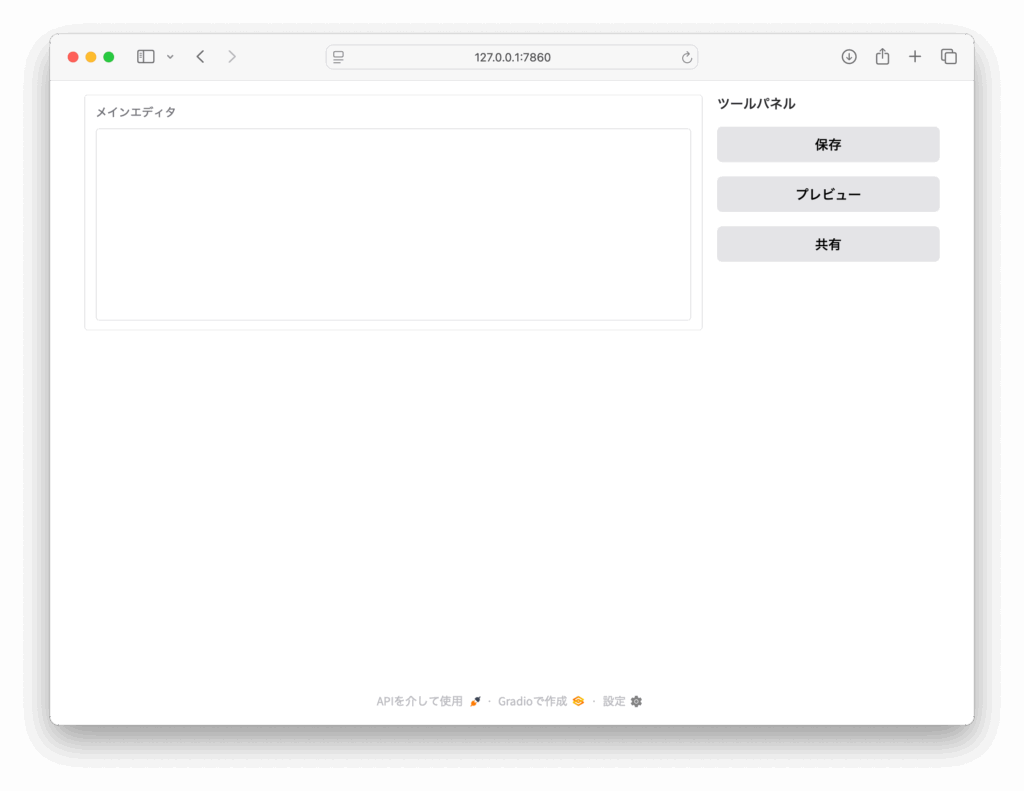
scale計算の内部仕様:
/* Gradio内部で生成されるCSS Grid */
.gradio-row {
    display: grid;
    grid-template-columns: 3fr 1fr;  /* scale=3, scale=1 の場合 */
    gap: var(--spacing-md);
}

/* 折り返し時は縦積み */
@media (max-width: 768px) {
    .gradio-row {
        grid-template-columns: 1fr;
        grid-template-rows: auto auto;
    }
}7.3 高度なレスポンシブ設計パターン
def create_responsive_dashboard():
    with gr.Blocks(theme=gr.themes.Base()) as demo:
        # ヘッダー:常に1行で表示
        with gr.Row():
            gr.Markdown("# 📊 ダッシュボード", scale=1)
            with gr.Column(scale=0):  # 右端に固定
                gr.Button("⚙️", size="sm")
                gr.Button("👤", size="sm")

        # メインコンテンツ:3カラムレイアウト
        with gr.Row():
            # サイドナビ(画面が狭いと自動で隠れる)
            with gr.Column(scale=0, min_width=200, visible=True) as sidebar:
                gr.Markdown("### ナビゲーション")
                nav_items = ["📈 分析", "📊 レポート", "⚙️ 設定"]
                for item in nav_items:
                    gr.Button(item, variant="secondary", size="sm")

            # メインエリア
            with gr.Column(scale=2, min_width=400):
                # タブでコンテンツを整理
                with gr.Tabs() as main_tabs:
                    with gr.TabItem("概要"):
                        # カード型レイアウト
                        with gr.Row():
                            with gr.Column(scale=1, min_width=200):
                                gr.Number(label="総売上", value=1250000, interactive=False)
                                gr.Number(label="今月の売上", value=350000, interactive=False)
                            with gr.Column(scale=1, min_width=200):
                                gr.Number(label="アクティブユーザー", value=2840, interactive=False)
                                gr.Number(label="新規登録", value=156, interactive=False)

                        # グラフエリア
                        gr.Plot(label="売上推移")

                    with gr.TabItem("詳細分析"):
                        with gr.Accordion("フィルター設定", open=False):
                            with gr.Row():
                                gr.DateRange(label="期間")
                                gr.Dropdown(label="カテゴリ", choices=["全て", "商品A", "商品B"])

                        gr.DataFrame(label="データテーブル")

            # 右サイドパネル(補助情報)
            with gr.Column(scale=0, min_width=250, visible=True) as right_panel:
                gr.Markdown("### 最近の活動")
                gr.Textbox(label="通知", lines=8, interactive=False)

        # モバイル用の制御
        def toggle_mobile_layout(screen_width):
            # 画面幅に応じてサイドバーの表示/非表示を制御
            if screen_width < 768:
                return gr.update(visible=False), gr.update(visible=False)
            else:
                return gr.update(visible=True), gr.update(visible=True)

        # 実際のアプリではJavaScriptで画面幅を監視
        # screen_width = gr.State(1200)  # 初期値
        # screen_width.change(toggle_mobile_layout, inputs=screen_width, outputs=[sidebar, right_panel])

    return demo

demo = create_responsive_dashboard()
demo.launch()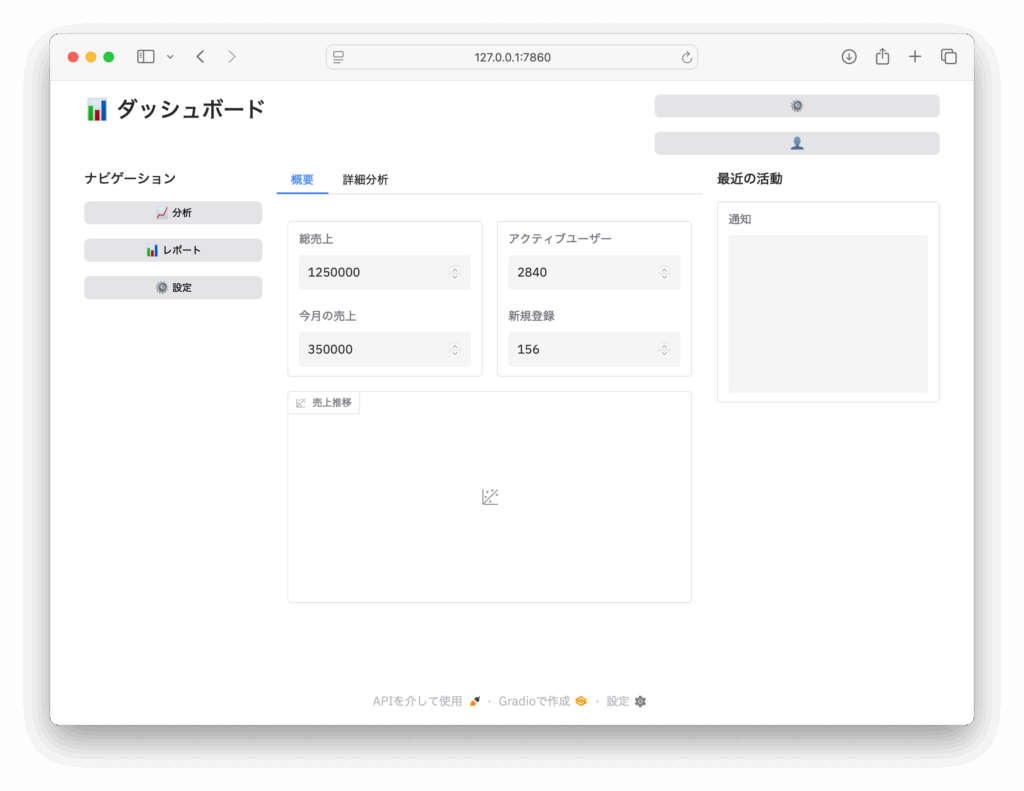
- Pythonの関数定義(def)とwith文(コンテキストマネージャ)を多用し、UIの階層構造を表現
- Gradioの各UIコンポーネント(Blocks, Row, Column, Tabs, TabItem, Accordion, Number, Plot, Dropdown, DataFrame, Markdown, Button, Textboxなど)をインスタンス化して画面要素を配置
- レイアウト制御は
scaleやmin_widthなどの引数で柔軟に指定 - forループでボタンを動的生成(Pythonのリストとイテレーション)
- イベント制御用の関数(toggle_mobile_layout)もPythonの関数として定義
- 画面幅による表示制御は、Pythonの条件分岐(if文)で記述(ただし実際の画面幅取得は未実装)
7.4 min_widthとmax_widthの詳細制御
Gradio 4.15以降では、より細かいサイズ制御が可能になりました:
with gr.Blocks() as demo:
    with gr.Row():
        # 固定幅のサイドバー
        gr.Column(
            min_width=200,
            max_width=300,  # 最大幅制限
            scale=0
        )

        # 可変幅のメインコンテンツ
        gr.Column(
            min_width=400,
            max_width=1200,  # 大画面でも読みやすさを保持
            scale=1
        )

demo.launch()7.5 デバイス特化の最適化
# デバイス検出とUI最適化
def detect_device():
    """JavaScript経由でデバイス情報を取得(擬似実装)"""
    return {
        "is_mobile": False,
        "screen_width": 1200,
        "touch_enabled": False
    }

def create_adaptive_ui(device_info):
    if device_info["is_mobile"]:
        # モバイル最適化UI
        with gr.Blocks(css=".gradio-button { height: 44px; }") as demo:  # タッチ操作向け
            with gr.Column():  # 縦積みレイアウト
                gr.Textbox(label="入力", lines=2)
                gr.Button("送信", size="lg")
    else:
        # デスクトップ向けUI
        with gr.Blocks() as demo:
            with gr.Row():  # 横並びレイアウト
                gr.Textbox(label="入力", scale=3)
                gr.Button("送信", scale=0)

return demoレスポンシブ設計のベストプラクティス:
- モバイルファースト:最小画面から設計し、段階的に大画面対応
- タッチフレンドリー:ボタンサイズ44px以上、間隔は8px以上
- 読み込み速度:大画面用の重いコンテンツは遅延読み込み
- アクセシビリティ:キーボードナビゲーション、スクリーンリーダー対応
まとめ
gr.Blocksを活用すれば、GradioでのUI設計は驚くほど自由になります。
主要な学習ポイント:
- レイアウト制御:Row/Columnでグリッド構造を自在にコントロールし、scaleパラメータで柔軟な比率調整が可能
- コンポーネント管理:Tabs/Accordionで機能や情報を整理し、ユーザビリティを向上
- 非同期処理:同期・非同期両方のイベントハンドリングで、高パフォーマンスなUI応答を実現
- レスポンシブ対応:min_width/max_widthや自動折り返しで、あらゆる画面サイズに対応
実装時のベストプラクティス:
- 設計フェーズ:モバイルファーストで画面設計し、段階的にデスクトップ対応
- 開発フェーズ:コンポーネントの再利用性を考慮し、関数化・モジュール化を推進
- テストフェーズ:異なるデバイス、ブラウザでの動作確認を徹底
- デプロイフェーズ:セキュリティ設定、パフォーマンス監視、ログ管理を適切に設定
これらの技術を組み合わせることで、デスクトップでもモバイルでも快適で安全なインターフェースを構築できます。Gradioの持つ柔軟性を最大限に活用し、プロダクション品質のWeb UIアプリケーション開発にぜひチャレンジしてください。
参考リンク
- Gradio公式ドキュメント
- Blocks とイベントリスナー: https://www.gradio.app/guides/blocks-and-event-listeners
- テーマとカスタマイズ: https://www.gradio.app/guides/theming-guide
- セキュリティガイド: https://www.gradio.app/guides/security
- コミュニティリソース
- Gradio GitHubリポジトリ: https://github.com/gradio-app/gradio
- HuggingFace Spaces: https://huggingface.co/spaces
- コミュニティフォーラム: https://discuss.gradio.app/
- 関連技術ドキュメント
- CSS Grid Layout: https://developer.mozilla.org/docs/Web/CSS/CSS_Grid_Layout
- WebSocket API: https://developer.mozilla.org/docs/Web/API/WebSockets_API
- Python AsyncIO: https://docs.python.org/3/library/asyncio.html
最後まで読んでいただきありがとうございます。
ご意見、ご感想はコメント欄までお願いします。


コメント